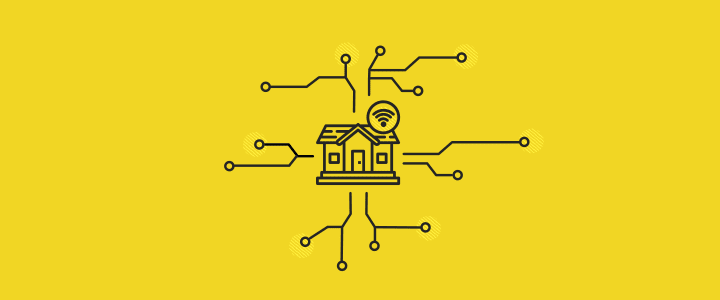
Raspberry Pi and AWS IoT – how to connect?
In my previous article about AWS IoT, I described what it is and what features it includes. Now, I’d like to tell you how I managed to create an app in Raspberry Pi 3 Spring Boot that connects with the AWS IoT cloud to control a lightbulb. I will also show you the practical application of the Device Shadow service. This text will help you learn how to connect to the AWS cloud and how to maintain and control the device state update thanks to the Device Shadow.

Table of contents
What’s more, you can take a look at a video featured in the article, which shows how the app works and presents the rudiments of building efficient automated networks for home.
The application and the certificates
For the purpose of this article, I created a simple program, built a device to control a lightbulb, and started it all on the Raspberry Pi 3 mini-PC. To control the lighting, I used the Songle 230V/10A relay. For safety reasons, I used a LED light that is able to work with a much lower voltage. However, it’s possible to use a 230V/10A electric bulb as well.
The whole control app was written in Java 8, using the Spring Boot framework. The relay is managed by the Pi4J library. Obviously, to connect to the AWS cloud, I used the library previously prepared by the producer, available at github. It’s worth mentioning that the producer prepared some sample code for Java, Python, CPP, and Arduino Yún as well.
Before constructing the app, I read the AWS IoT documentation. While doing that, I came across sample programs delivered by the producer. They were deployed at github, which allows the creation of a simple app connecting with the cloud.
I also had a look at a couple of first Google search results concerning AWS IoT. With that basic knowledge and following the recommendations in the documentation, I decided to create an AWS account. I won’t go into detail about that, as there’s a lot of information about this topic online.
The next stage was the activation of the AWS IoT service on my AWS account. I created the first device named “bulb”. It was a lightbulb connected to Raspberry Pi. I was going to control it from the AWS cloud web interface. I also wanted to test the Device Shadow.
After creating the device in the web interface, it was about time I generated certificates. To safely connect to the AWS cloud, you need certificates. You can generate them on your own in the AWS web interface; they are the so called one-click certificates.
You can also deliver your own certificates, but they must be signed by a CA. I chose the first option: the one-click certificate. I really didn’t find it necessary to deliver my own certificates for the solution I was building. When you generate a couple of certificates, public and private, you need to make sure they are safely stored on the disk.
To control the lightbulb, I created a new device named “bulb” in the AWS IoT web interface. I generated a one-click certificate for it and provided it with the permission below, “policies”.
{
  "Version": "2012-10-17",
  "Statement": [
    {
      "Effect": "Allow",
      "Action": "iot:*",
      "Resource": "*"
    }
  ]
}
You must remember that the more permissions you provide in the certificate, the higher the chance of the system being hacked. On the other hand, though, if there are too few permissions, there might be some problems in data traffic. In my case, I set all the available permissions. It was my first project using the AWS IoT cloud, so I didn’t want to get stuck for hours struggling with a complicated system of permissions and establishing a connection.
Of course, in a professional application, these permissions should be as restrictive and unique as possible for a given type of device. There’s no point in granting all permissions for a device which is only listening for a status update, e.g. a bulb. However, you should give permissions for sending communication to a topic for, e.g. a temperature sensor.
Connecting to the cloud
To connect to the cloud, I followed the examples that I found at github. To do that, I created a simple piece of code which could establish the connection by using the generated one-click certificate.
private SampleUtil.KeyStorePasswordPair getKeyStorePasswordPair() {
 return SampleUtil.getKeyStorePasswordPair(
         awsIotProperties.getCertificateFile(),
         awsIotProperties.getPrivateKeyFile());
}
private void setupAwsIoTClient(SampleUtil.KeyStorePasswordPair pair) {
 if (client == null) {
   client = new AWSIotMqttClient(
           awsIotProperties.getClientEndpoint(),
           awsIotProperties.getClientId(),
           pair.keyStore,
           pair.keyPassword);
 }
}
public void initializeConnection() {
 SampleUtil.KeyStorePasswordPair pair = getKeyStorePasswordPair();
 setupAwsIoTClient(pair);
 try {
   if (client.getConnectionStatus() == AWSIotConnectionStatus.DISCONNECTED) {
     client.connect();
   }
 } catch (AWSIotException e) {
   LOGGER.error("Exception while connecting to AWS Iot", e);
 }
}
Device Shadow
Having successfully connected to the cloud, I decided to test the Device Shadow service. Its creators refer to it already in the first tutorial available after you’ve created an AWS account. With that in mind, I created a class which was meant to store the data about my lightbulb’s status.
public class BulbDevice extends AWSIotDevice {
 @AWSIotDeviceProperty
 private boolean activated;
 public BulbDevice(String thingName) {
   super(thingName);
 }
 public boolean isActivated() {
   return activated;
 }
 public void setActivated(boolean activated) {
   this.activated = activated;
 }
}
Mind you: the class created for the lightbulb inherits from the AWSlotDevice class. As you can see the class has one activated attribute with the @AWSlotDeviceProperty annotation, which indicates that a given field should be controlled and updated by the Device Shadow.
Thanks to this, you don’t need to worry about a situation of losing the connection, when you have to reconnect with the lightbulb, check its status, and upload the latest update. The Device Shadow will take care of all that.

To test the Device Shadow, I added a piece of code which checks the lightbulb state every second. Then, in the web interface of my AWS account, I set a new desired attribute for the bulb. Below, you can see the object of the request to change the state of the lightbulb from on to off.
{
  "desired": {
    "activated": true
  },
  "reported": {
    "activated": false
  }
}
The reported request above demonstrates that the current state of the lightbulb is off. The desired is the expected state: the one you want to turn the lightbulb to. At that point, after saving the changed settings, AWS communicates with my device. Shortly after that, the activated attribute changes into true, and the object in the web console changes its status into:
{
  "reported": {
    "activated": true
  }
}
In the meantime, the desired disappeared, which means that there was a state update, so the desired won’t be of use anymore. If you have lost the connection with the device for some reason, the desired state will be displayed until there is another state update.
Raspberry Pi
Alright, we’ve managed to connect with the cloud, we know how to send and receive the messages from the topic, and we also know how to control the device state change, with the help of the Device Shadow service, which takes care of any changes that occur if you lose the connection with the device.
Another step is to program the hardware – Raspberry Pi – so that it changes the state of the pins controlling the relay, from high to low, and the other way round. To do that, I used the Pi4J library, which allows the programming of Raspberry Pi in Java.
To begin with, I created a handler for the lightbulb with a specific PIN.
public ControlGPIO() {
 gpio = GpioFactory.getInstance();
 pin = gpio.provisionDigitalOutputPin(RaspiPin.GPIO_00, "MyBulb", PinState.HIGH);
}
Next, depending on the state value sent, I activated or deactivated the relay, i.e. I turned the lightbulb on and off (in my case, the LED light).
if (bulbDevice.isActivated()) {
 controlGPIO.turnOn();
} else {
 controlGPIO.turnOff();
}
The final stage was to test the whole app. I compiled it into a jar file, which I sent – along with the certificates – to the AWS at Raspberry Pi via the scp service.
I logged in to my Raspberry Pi account and I started the app. After the server had been loaded, I tested the Device Shadow service. Everything functioned well. You can see the final outcome in the video below.
Raspberry Pi, Spring Boot, and AWS IoT - a summary
Initially, the greatest challenge I faced was connecting to the IoT cloud. As it turned out, the permissions were problematic too, or, to be more precise, their incorrect setting in the policies. Having solved that mistake, I had no further problems in the project. In my opinion, the Device Shadow is an awesome service. It allows you to actually delegate the device state control to an external service, namely – the Shadow Device. Thanks to that, you don’t have to worry about state management and updating, and, as a result, you are able to concentrate on the logic of your home automation.
Share this article: